GPIO pin on the RPi to trigger PTT
When using the Raspberry Pi for Packet Radio or APRS it is essential to bring the radio into transmit mode before sending any packets. One hack that works with varying degrees of success is to use the radio's VOX (Voice Operated Switch) if it has one. The idea being that dummy packets that are sent before the actual data are used to trigger the vox and we then hope that the radio goes into transmit just in time before the actual data is sent. With vox sensitivity on the radio and TXDELAY settings in /etc/ax25/soundmodem we have some variables to play with but it remains a bit messy.
The preferred method is to key the radio using a dedicated PTT line. This is normally achieved by putting PTT to GND and the radio goes into transmit. This connection of PTT to GND is usually done inside a hand-held microphone by the operator.
For automated operation such as Packet Radio and APRS where packets are sent at the control of the computer an alternative method is required.
With Serially (RS-232) connected TNC's it is possible to use the RTS line on the serial port as a PTT trigger. This line will go from HIGH to LOW when a packet is being transmitted over the serial port and will go from LOW to HIGH when the packet has finished transmitting over the serial port. We can use this line to trigger the PTT of a radio.
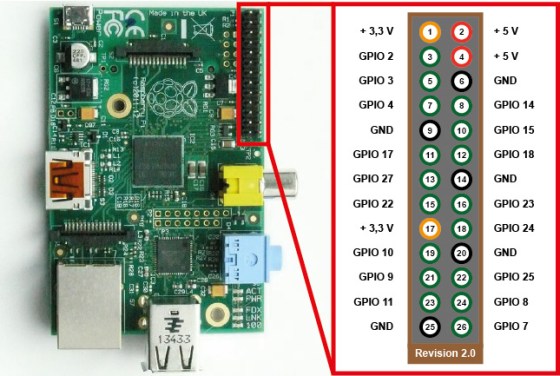
Before we can access this RTS signal on the Raspberry Pi we need to tell it to slightly shuffle the GPIO pinout a bit. The GPIO header on the RPi has several 'mappings' which tell which pin what to do (see http://elinux.org/RPi_BCM2835_GPIOs). We can change the function of GPIO pins by changing the mapping for those pins. The chip controlling the GPIO on the RPi knows of three pre-defined mappings. Although the mapping schemes are fixed, there is one mapping which brings out RTS of the on-board serial port of the RPi to a GPIO pin. For the (older) Rev2 Model A and B RPi's this GPIO pin is on the P5 header, for the A+ and B+ models the GPIO pin is on the main header.
Unfortunately the Raspbian software does not come with a program to easily modify the GPIO pin mapping. For that we need to make use of a third-party piece of software from Github user rewolff called bw_rpi_tools.
Full source code and instructions can be found here: https://github.com/rewolff/bw_rpi_tools
if one does not already have git support installed, that must be done upfront:
- might be required
sudo apt-get update
- get git support
sudo apt-get install git-core
- …follow the prompt
To use the IO pins we first need to “free” the serial port for our usage. The default configuration of the linux image uses the built in serial port to dump kernel messages and as a way to log into your raspi.
From /boot/cmdline.txt we need to remove the following options:
console=ttyAMA0,115200 kgdboc=ttyAMA0,115200
We also need to stop the system to spin up a terminal on the serial port. For this we put the following statement in /etc/inittab into comment (add # in front of the line):
#T0:23:respawn:/sbin/getty -L ttyAMA0 115200
OK, the serial port is ours, but we still need a tool to switch the GPIO assignment.
In the Makefile change the line: cp $(BINARIES) $(SCRIPTS) $(BINDIR) to cp $(BINARIES) $(BINDIR)
before the make install type: make followed by the command shown above: sudo make install
If you now look into the (default) install directory /usr/local/bin you will find: a) the file: gpio_list b) a soft link: gpio_setfunc -> /usr/local/bin/gpio_list and some more soft links.
# as pi user,
cd /home/pi
mkdir rpi-tools
cd rpi-tools/
# if you have not yet installed git, this must be done upfront
# see comments section below on how to do this
git clone https://github.com/rewolff/bw_rpi_tools.git
cd bw_rpi_tools/gpio
# depending on the version or status of the tools you might need to fix the Makefile
# see comments section below
make
sudo make install
I found that if you goto /rpi-tools/bw_rpi_tools/bw_tool and do a make there you can then get the sudo make install to partially work enough to get the gpio_list working -No luck yet for the setfunc
Blatantly copied from:
https://dl8scu.wordpress.com/2013/02/10/are-you-lucky-no-usb-to-serial-converter-needed/
Once the software is installed it is simply a matter of setting the GPIO mapping for the desired pins at boot-up of the system. I prefer to place the following lines inside /etc/rc.local
# change GPIO pins 30 and 31 to mapping ALT3
# See: http://elinux.org/RPi_BCM2835_GPIOs
# See: https://github.com/rewolff/bw_rpi_tools
/usr/local/bin/gpio_setfunc 30 ALT3
/usr/local/bin/gpio_setfunc 31 ALT3
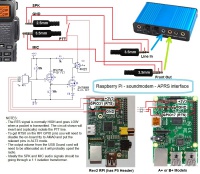
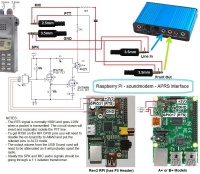
Below are two schematics that show how to interface to different handheld radios to the RPi with the GPIO PTT method. Please note that many radios will have different pinouts so it is important to check the correct way of keying PTT before you try anything out.
Baofeng UV-5R to RPi with GPIO PTT
This image shows:
- Where to find the RTS pin on the GPIO headers for the various RPi Models
- The pinout of the plugs for the Baofeng UV-5R handheld transceiver
- A schematic for inverting the logic signal of the RTS pin so it can be used to switch PTT to GND using a P-Channel FET
Icom IC-P2AT to RPi with GPIO PTT
This image shows:
- Where to find the RTS pin on the GPIO headers for the various RPi Models
- The pinout of the plugs for the Icom IC-P2AT handheld transceiver
- A schematic for inverting the logic signal of the RTS pin so it can be used to switch PTT to GND using a P-Channel FET


